Weekend Project: Paper Star

If you’re looking for something to do this weekend or while away a bit of time in a mindful creative way, why not make yourself this paper star?
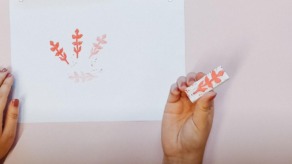
Ingrid van Willenswaard, of the blog Ing-Things, has created this lovely DIY for us, using the prettiest of paper. The Flow Book for Paper Lovers has a wide range of different papers to use; Ingrid used sheets from edition 2 for this star (which is now sold out), but you can find plenty of others in issues 3 or 4.

 This is what you need for the star:
– A beautiful piece of paper (from the Flow Book for Paper Lovers)
– A pair of scissors
– Glue (Ingrid likes working with a glue stick)
– A ruler
 Step 1
Cut eight squares of 8×8 cm. You can get six of these squares from one sheet of paper. If you cut them a little smaller, 6×6 cm for example, you’ll manage to get eight squares from one sheet.

Step 2
Fold the paper as shown in the picture above, making two straight folds in the middle, and two diagonal folds. Unfold the paper to a full square again.
 Step 3
Now fold two triangles inwards. Do this by pushing the paper inwards at the straight folds (see the arrows in the picture).
 Step 4
If all is going well, this is how it should look now 😉
 Step 5
Fold the two points downwards, along the folding line in the middle.
 Step 6
Repeat steps 2 to 5 with each square of paper to make a total of eight triangles.
 Step 7
Place some glue on points A and B. Slide the triangles into each other, following the arrows, and it will become clear how it connects. Once the points are in the right position, push down to let the glue set. Continue with all eight triangles until you have a complete star. Once the star is done, you can snip the points with your scissors to make it neater if you want.
![DIY ster foto 9[1]](http://bin.snmmd.nl/m/xvj7lf72d6io.jpg) Three ideas from Ingrid:
Three ideas from Ingrid:
“You can attach a loop of string to the top of the star and hang it somewhere. It looks great in the Christmas tree or hanging from a branch.”
 “I like it when the stars are left loose at the points, because of the 3D effect. But you can also glue all the points into place to make a flat star.
 “You can write names on the stars and use them as place cards on the dining table. Or glue them on to a festively wrapped gift.”
 One more idea: You can pin the star to your dress as a corsage.