Envelope tutorial

In this tutorial we’ve included instructions for “globetrotter” envelopes. They are the are perfect way to talk about your next journey or last adventure, and we all know a dear friend who would love to receive a nice hand written letter.
You need
* envelope
* (old) maps
* glue
* scissors
* ruler
* pen

1. Materials
Think about all of the materials you’re going to need. Decide which maps you want to use ; atlases, prints of Google maps, antique maps – you can use any kind.

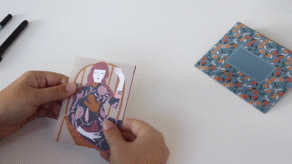
2. Drawing
Separate your plain envelope slowly and use it as a template, which you can then draw on to the reverse side of your map with a pen.

3. Cut Out Template
After you have transferred your template on to the map or card it is now easy to cut it out along the edges.

4. Stick Envelope Together
Use the adhesive to glue the envelope together. Now you only need to write a nice message, stick on a stamp and your “globetrotter” envelope is ready to post.

This tutorial was published before by DaWanda, where you can find even more creative projects.