

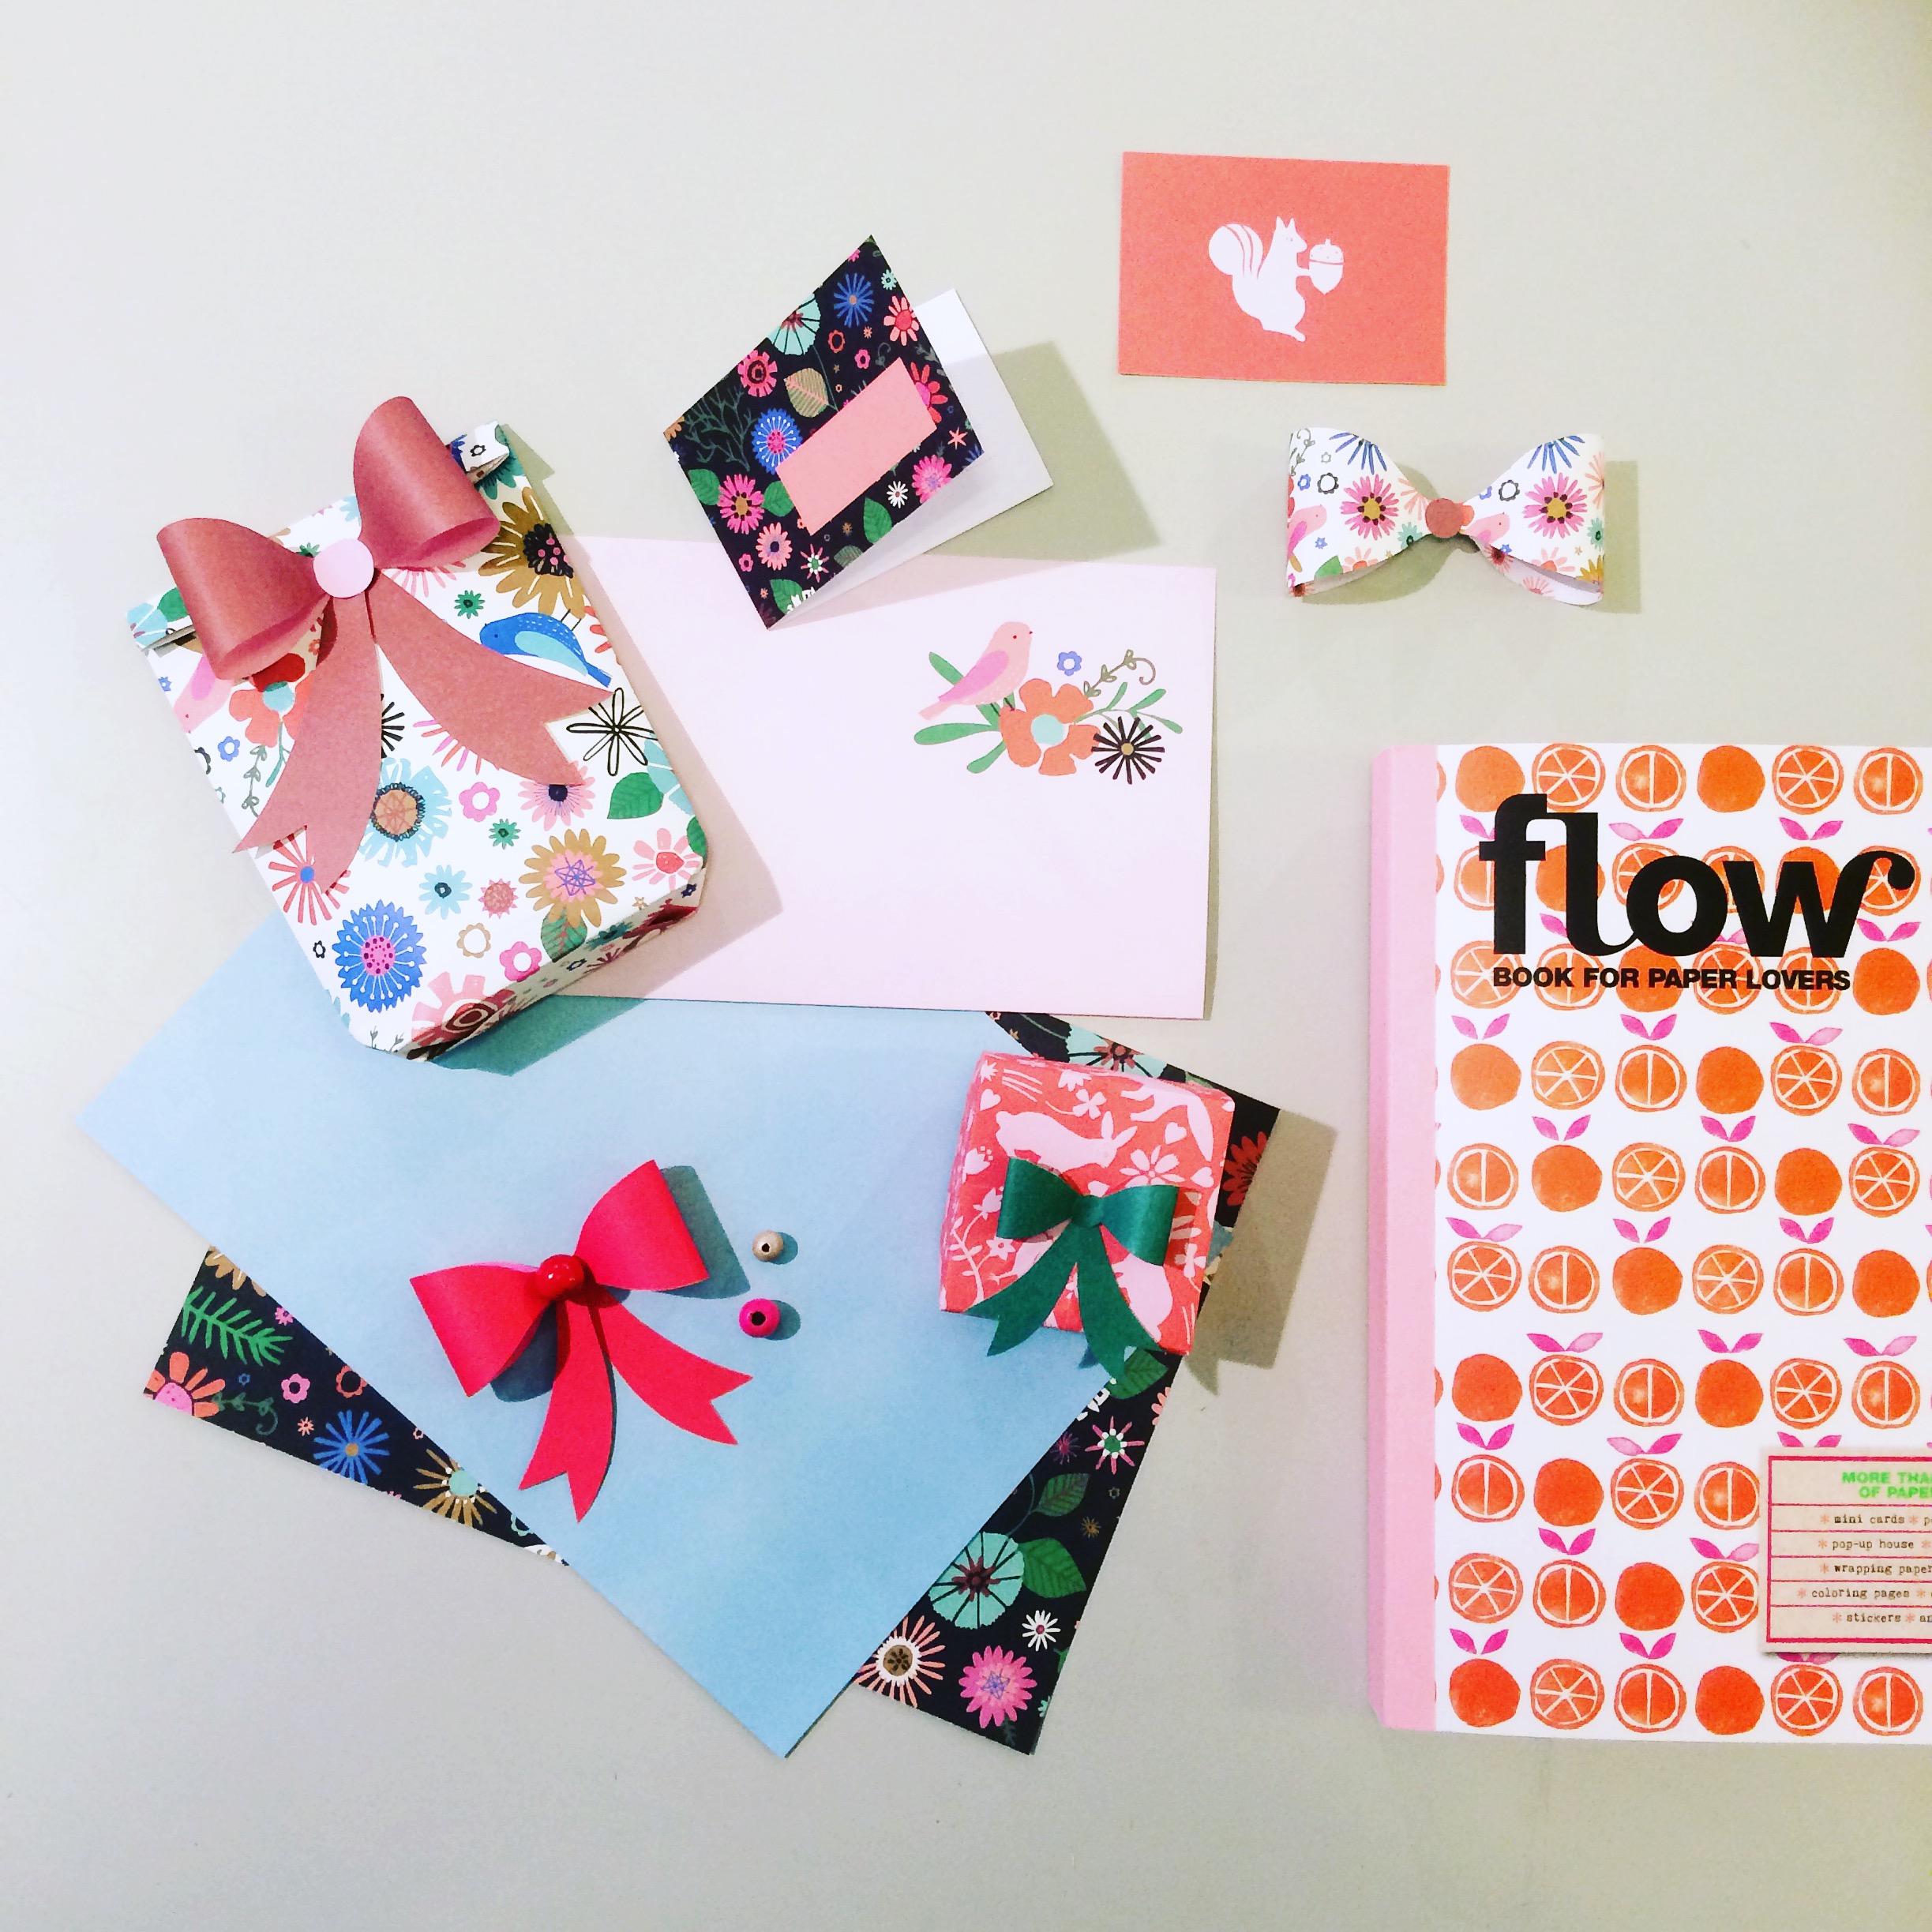
From envelopes and garlands to notebooks, Lisa Manuels of the shop Elle Aime can dream up a thousand and one things to do with the paper from the Flow Book for Paper Lovers. In this tutorial, Lisa shows us how to make a paper bow; simply print the template out and use it to make an infinite number of bows.
“I always love making these,” says Lisa. “You can have lots of fun with them: put them on gifts, decorate envelopes, make a nice garland from them, or stick them onto cocktail sticks and pop those into cupcakes. I have the bows hanging on the wall in my workplace, between all the cards and illustrations I have made or received.”
What you’ll need:
– Flow Book for Paper Lovers
– Scissors
– Pencil
– Double-sided sticky tape (or glue)
– Printout of the bow template
1. Cut the bow components out. There are three different sizes, and you can combine the different components together if you wish (such as a large bow with two small ribbons below).
2. Find your favorite papers in the book and tear them out. The book is full of double-sided sheets, which will make the bows extra special as you will have a nice color or pattern visible on the inside of the bow, too.
3. Use the pieces you have cut out as a stencil; place them on the paper you have chosen, and draw around them with the pencil. Be sure to draw around the ribbon part twice: once with the tail on the left, and once with it on the right.
4. Now to make the bow itself. Take one of the outer points and bring it to the center. If you fold it flat, you have a two-dimensional bow, but if you leave it arched, you’ll have a three-dimensional one. Stick the points in the middle of the bow with a piece of double-sided tape (or glue). Fasten the ribbons underneath, and use the circle to make the ‘’knot’ of the bow. You can also use a bead, button or even a small pompom instead.
5. Dah-dah! Your bow is ready. Enjoy!


