

London-based illustrator Ruby Taylor creates a diverse range of work—from typography to patterns with fruits and vegetables. You will probably have come across Ruby’s work in Flow as she is regularly featured in the magazine. For our Dutch Vacation Box special, Ruby illustrated the journal section within the holiday book, as well as two sheets of stickers. This month, she tells us more about her life on our blog.
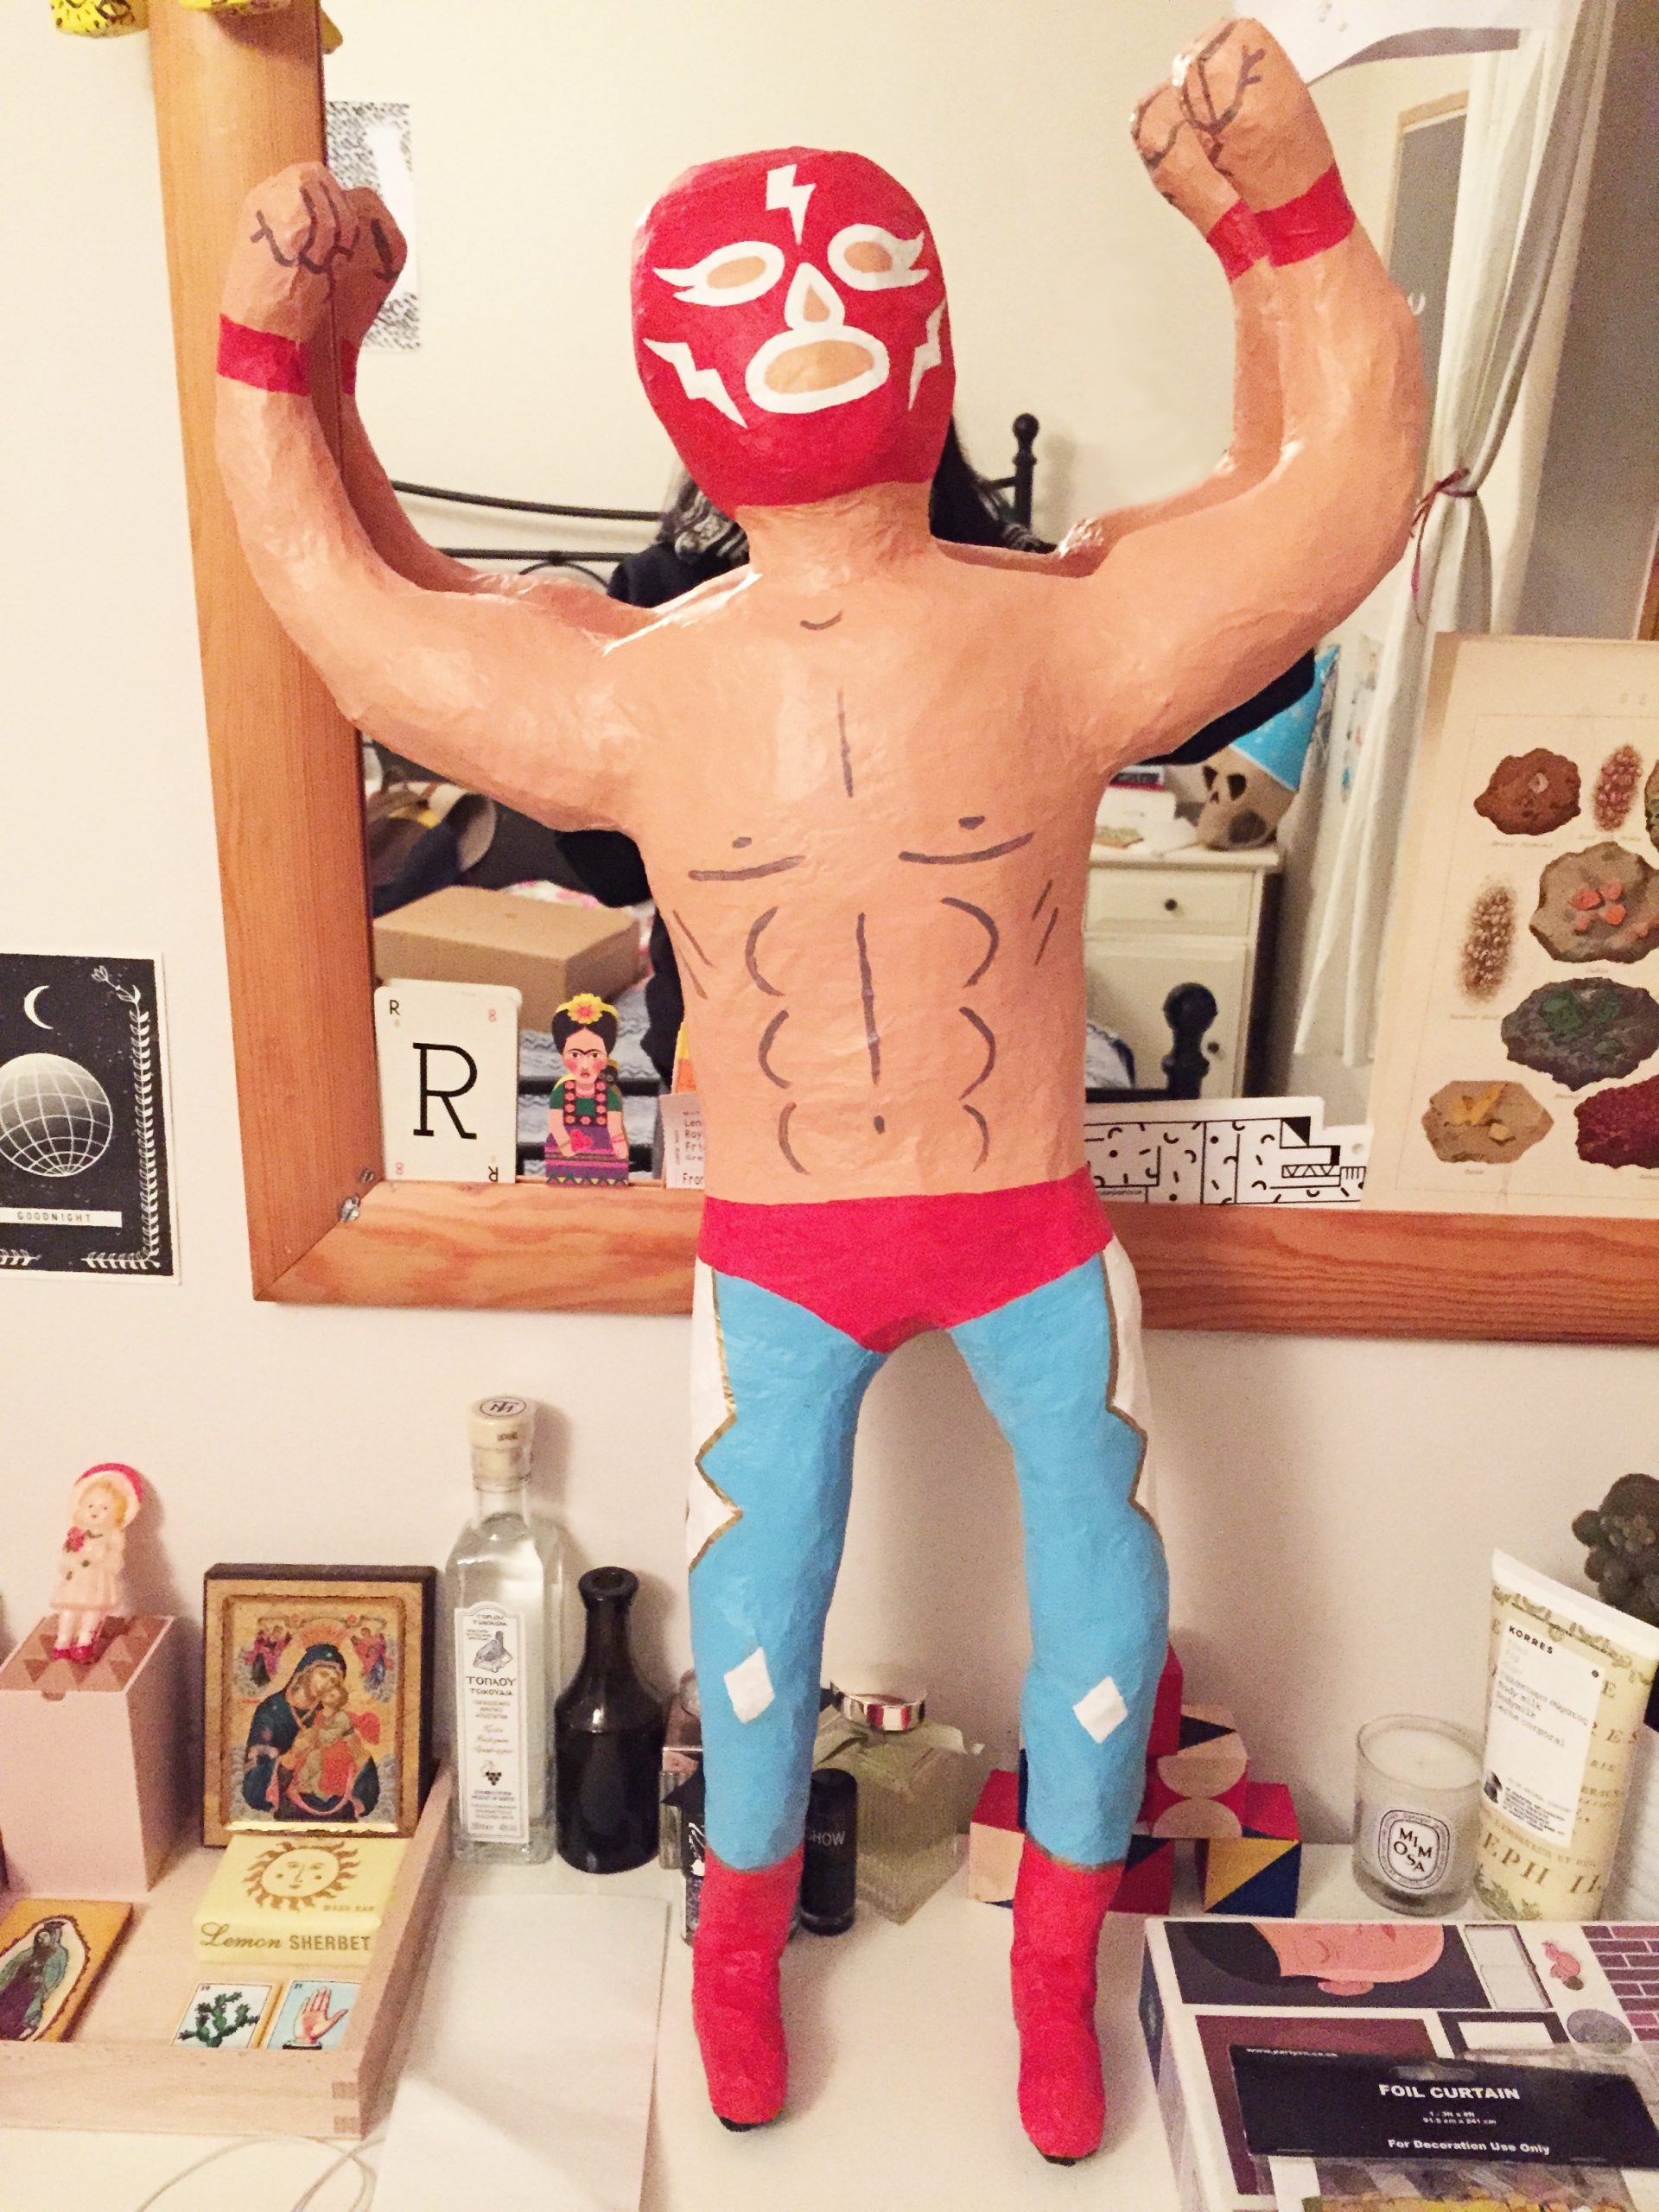
I love drawing and illustrating but there’s something so nice about making something 3D and tactile. I don’t get to do it very often but I love it so I wanted to share my favourite 3D project with you! I recently made a Lucha Libra Wrestler model as decoration for a party I was having, (but also because I really wanted to and the party was a great excuse to make something!). It was a method which my auntie taught me when I was a child and it’s great because it costs very little and uses up lots of old things.
You Need:
Scissors, glue, 7 – 10 old carrier bags, glue, masking tape, old bowl (for glue), acrylic paint, lots of old newspapers.
To get the shape of the body you need to start by making each limb. Take one of your carrier bags and scrunch up newspaper and stuff it into the bag. Keep stuffing newspaper into the bag and begin to shape it into your first arm or leg by creating a long sausage shape. Make sure the bag is quite full then start to tape around your shape. If there’s extra carrier bag you can either cut off the excess or wrap it around the shape. The tape will hold the bag and newspaper together in the shape you want. Make sure you cover the whole shape in masking tape so there’s no carrier bag showing. Use this method to make 2 arms, 2 legs, a head, some ‘pants’, feet and hands.
When you have made all your body pieces, lay them out together and check if they are all the same size/shape. Then begin to tape all the limbs together using your masking tape. Use lots of tape to make sure each limb is attached properly. At this point you could also add any extra features you might want on your model such as a nose, lips, or hair using bits of newspaper rolled up and taped on.
Once you have taped all your limbs together and are happy with the shape of your model you can begin to paper mache! Cut small strips of newspaper, mix the PVA with some water in your old bowl. Put some of the strips into the bowl and soak in the PVA (I don’t put all the strips in at once as they often get too wet and stick together). Cover the whole body in the newspaper strips and leave to dry. (It can take at least 24 hours to be fully dry.) Once the model is dry repeat the process for a second layer. This makes sure the model is nice and sturdy!
Once your model is fully dry and hard you can undercoat it in white paint. This makes it easier to paint onto and covers up the darker bits of news paper! Make sure to leave to dry.
Now you have your blank 3D canvas! Plan your design by sketching how you want it to look first. I wanted to make mine a Lucha Libra Wrestler so I researched some costumes and sketched my favourite before painting! You can go as wild as you like!
If you need to leave layers to dry make sure you do, it can be annoying having to wait but messy paint can ruin your design!

